Introduction
Process Mapping is fundamental to making improvements to any process. It is a fantastic way to get everyone to understand the current condition and give everyone a true understanding of the complete end-to-end process, often for the first time. People understand their part of the process but are not always aware of what other people do.
It always amazes me to witness how much waste is going on once a team starts to map its processes. Process Mapping is a great way to gain a common understanding of the challenges facing a service. Process Maps can be time-consuming to create, so it is important to only go to the level of detail required to achieve your improvement objectives. It is the act of getting people involved and the sharing of information that makes process mapping so powerful.
The task of jointly putting the map together creates a sense of ownership and urgency which cannot be achieved when an individual draws up a ‘theoretical’ map from the comfort of their desk.
Why use Process Mapping?
The main reason to map a process is to gain information about your current condition, the current wastes involved, with the view to creating an improved future state. It helps us understand who does what over time. Mapping can also give team members a better knowledge of the activities of other functions involved, out with their areas of expertise. This can lead to a higher level of understanding and improved co-operation between groups. People get a sense of the ‘big picture’ often for the first time.
Where should you do it?
Where possible, it is best to create your process map physically close to the business process that you are mapping. This allows the process mapping team to ‘walk’ the process if required to gain further clarity and understanding.
When should you use it?
Process Mapping can be used at any time to gain clarity and understanding of your current condition. In general, process mapping is best used when you want to move from your current state to an improved future state.
Who should be involved?
To put a representative process map together it is best to use a cross-functional multi-level team with responsibilities for the processes being reviewed. Team members should have a sound knowledge of their part of the business, and the team should have enough breadth of experience to cover all the business process activities. If there are small areas of very specific knowledge where there are gaps, then you should arrange to have experts on standby to come and share their knowledge at the appropriate time. It is always useful to have an experienced and neutral facilitator, to lead the Mapping activity.
What will you need to do it?
If you are going to physically create a Map you will need to prepare some basic materials ahead of time to create your process map. The most common items are:
- yellow, pink and green Sticky notes
- black marker pens
- roll of brown paper
- sticky tack
- sticky tape
If you're going to create a Map virtually online a tool like Miro will cover all the above.
If doing this physically, you will also need to arrange the use of a large room for the duration of the exercise.
The time required depends on the size of the process, but one day is the suggested maximum for this activity.
How to apply Process Mapping in 8 steps
Step 1: Identify the Process to be mapped
This should be a process that you feel needs to be improved and has buy-in from the rest of the team.
Step 2: Identify the start and end of the Process
Obtaining consensus as to the start and end points of the process is critical. Lack of agreement at this stage can cause confusion and delays later. You should use yellow sticky notes for all the process steps, including the start and end ones.

Step 3: Map out the current process and number the steps
Having identified the start and end points of the process we need to map out the process steps going from the beginning through to the end in sequence. We can do this using digital sticky notes or physical sticky notes depending on your environment. Map what happens, not what you would like to think happens.
You might not get this exactly right the first time and the details and sequence may require adjustment as you go along. When describing the process steps, it is useful to use a verb/noun format. For example, scan the document, review the report
We should also indicate decision points along the way and if there are parallel activities. We can place sticky notes in a way to show simultaneous activities taking place. This helps keep the map simple. It is also helpful to number the steps so that we can easily reference them at a later stage.

Step 4: Identify any wastes for each step
Having identified the start and end points, and having numbered each step in sequence, we now want to look at all the wastes associated with the steps in the process. There are eight types of waste that we want to look out for. These can be remembered by the handy acronym TIM WOODS: Transport waste, Inventory waste, Waiting waste, Over-producing waste, Over-processing waste, Defects and Skills waste. On the map, we use pink sticky notes to make these obvious.

Not every process step will have a waste associated with it, but it is amazing once you start to look, how many wastes you come up with.
Step 5: Identify an improvement for each step
Having identified as many wastes as possible for each step in the process we then look at potential improvements and countermeasures to mitigate the wastes. On the map we use green sticky notes to make these obvious.

If doing this physically, a top tip is to tape down the sticky notes, once you are happy with the map. I remember I was once in the USA running a workshop to map a large Chemical Process. It took us two days and the Process Map was spread over several walls of a Conference Room. I came in the next morning to find about a third of the sticky notes had fallen off the wall and were lying on the floor! We fixed it, but after that I always taped down the stickies once the map was complete!
Step 6: Review improvements as a basis for your CI plan
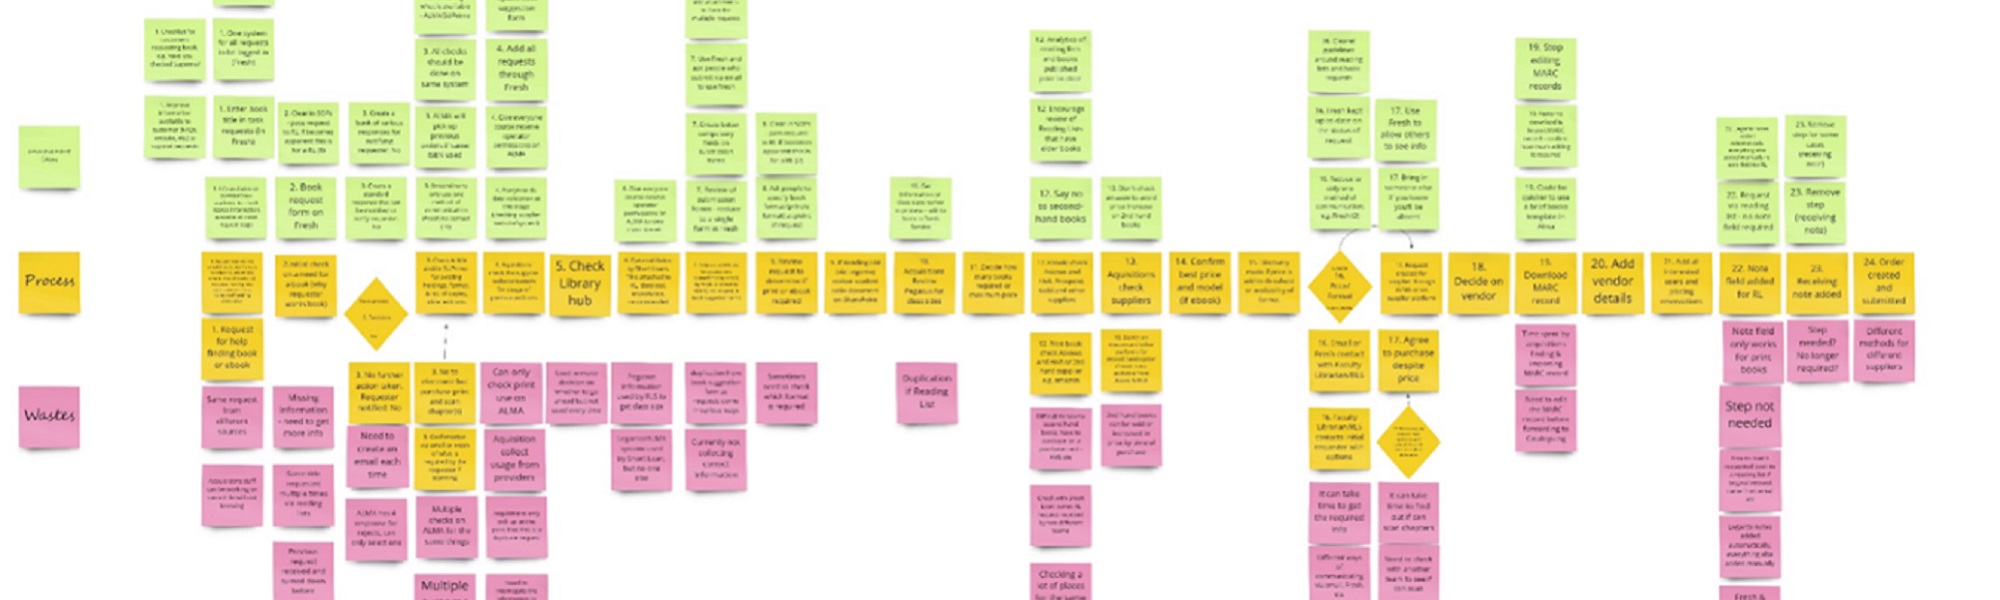
Having identified all the process steps, all the wastes, and all the potential improvements, we should end up with a process map that looks something like the one below. By using the yellow, pink, and green stickies consistently it will allow anyone in your organisation to be able to quickly understand the key steps of your process map, what are the wastes, and what are the potential improvements.

Step 7: Create a 'future state map'
Once you have completed identifying the waste, the next step is to draw a ‘future state map’. This should be your ‘ideal’ process with all the waste removed. It may not be possible to achieve this new process straight away. The new map can serve as a target to achieve.

Step 8: Implement the improvements
The final step is to implement the improvements identified. Plan, and ensure that all actions have an implementation date and an owner. There will be some things that can be done immediately, and other actions that will require more planning.
Summary
Process Mapping is a wonderful way to get a team to understand the current condition of a process. It can help individuals to see the bigger picture. It's a terrific way to identify Waste within the process and helps you focus and prioritise improvement activities.
Try it!
It's often helpful to create a high-level map of your process, called a SIPOC (Supplier, Inputs, Process, Outputs and Customers), before you get into this detailed level of Process Mapping. You can read my blog post “What is a SIPOC?".

